Creating Variable Length Trails in Houdini
Using the Trails SOP in Houdini makes it pretty trivial to create trails from points. However these trails will always have the same uniform length, so here's one such technique which lets you create random trail lengths.
Setup
To demonstrate this technique I'll take you through a basic particle setup, using a POP network. Here's how the finished thing will look in the network viewer.
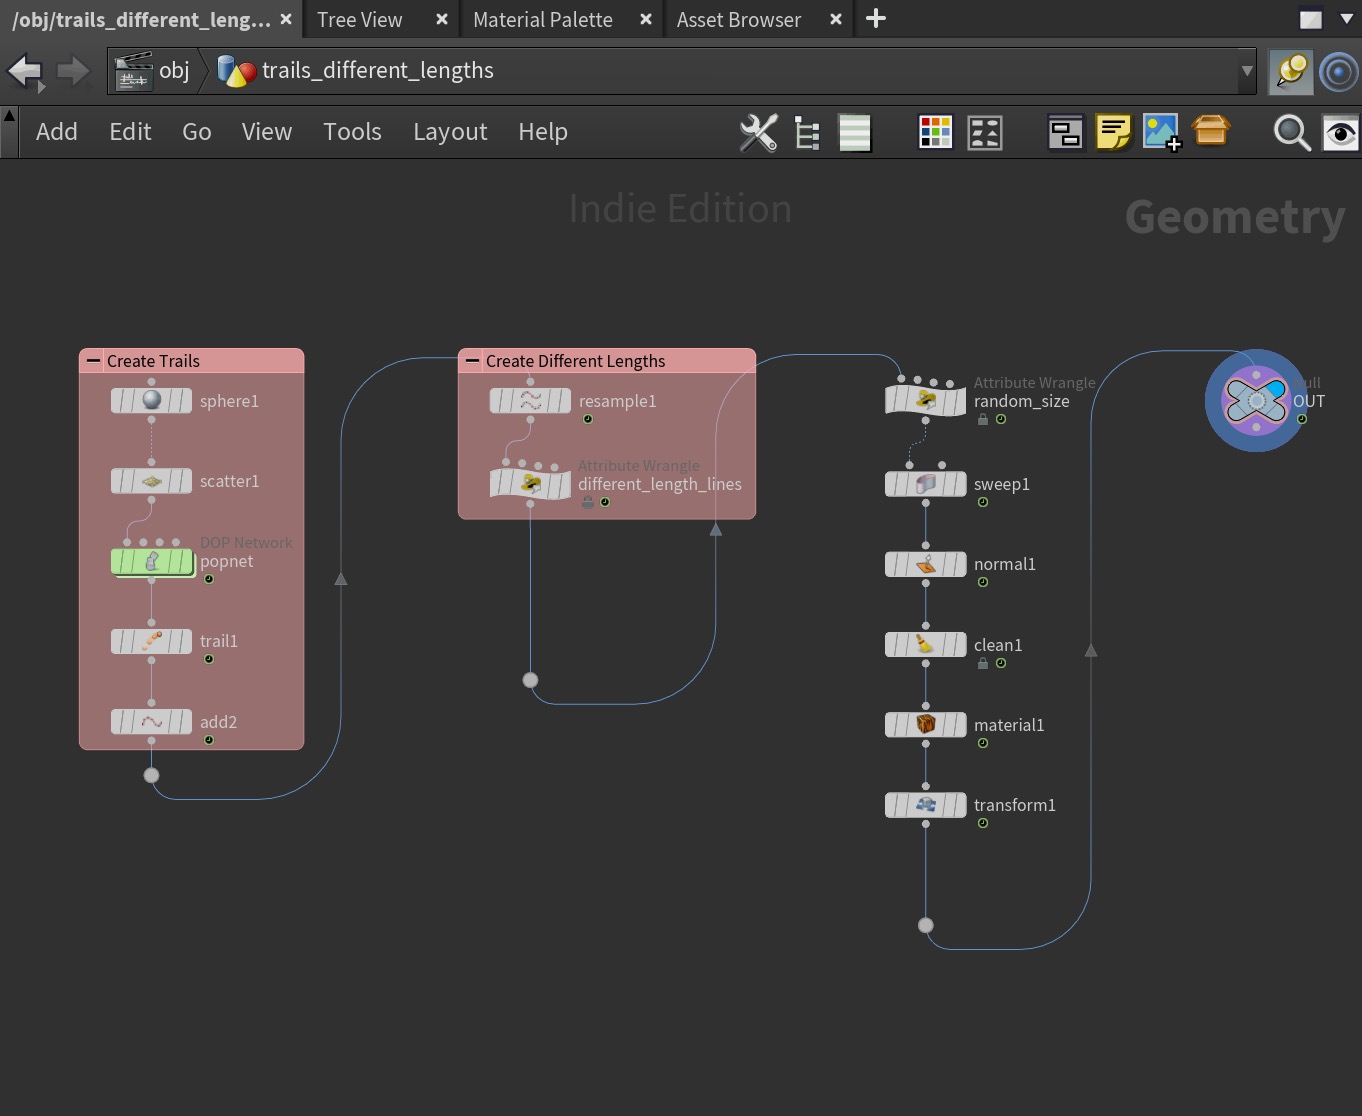
First, at the top level in Houdini, lay down a Geo node and dive inside.
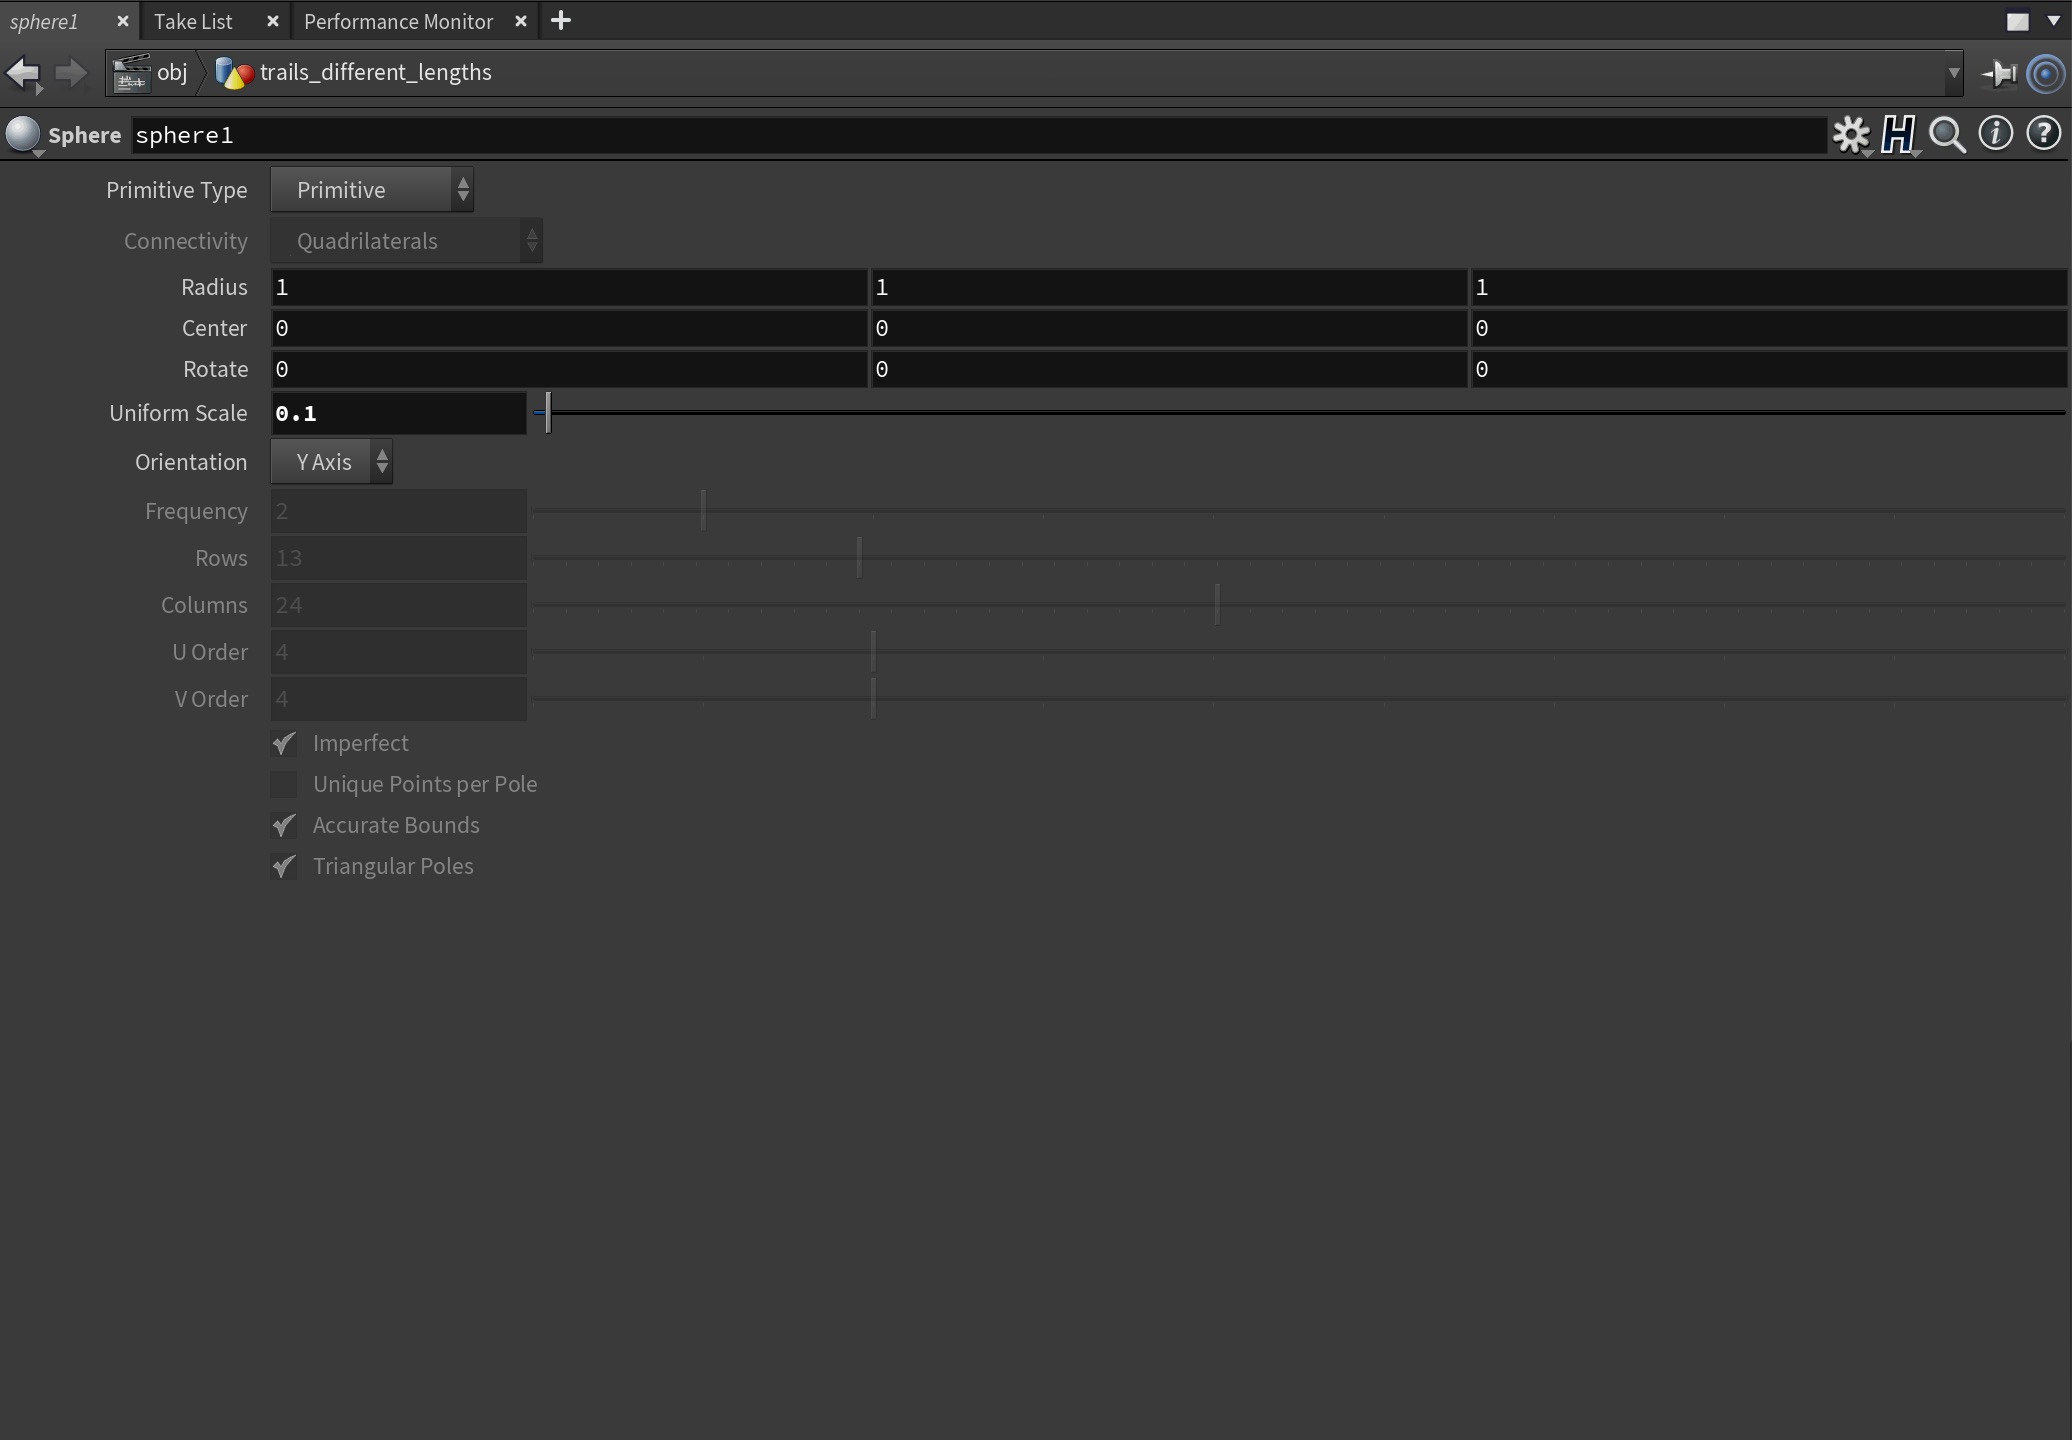
Next create a Sphere and change its uniform scale to be smaller — say 0.1.
Lay down a scatter SOP and scatter something like 500 points onto that sphere. These are the points that we will use in our POP network to create particles which will form the basis of our trails.
Creating the Particles
Wire in a Pop network and then double-click to dive inside.
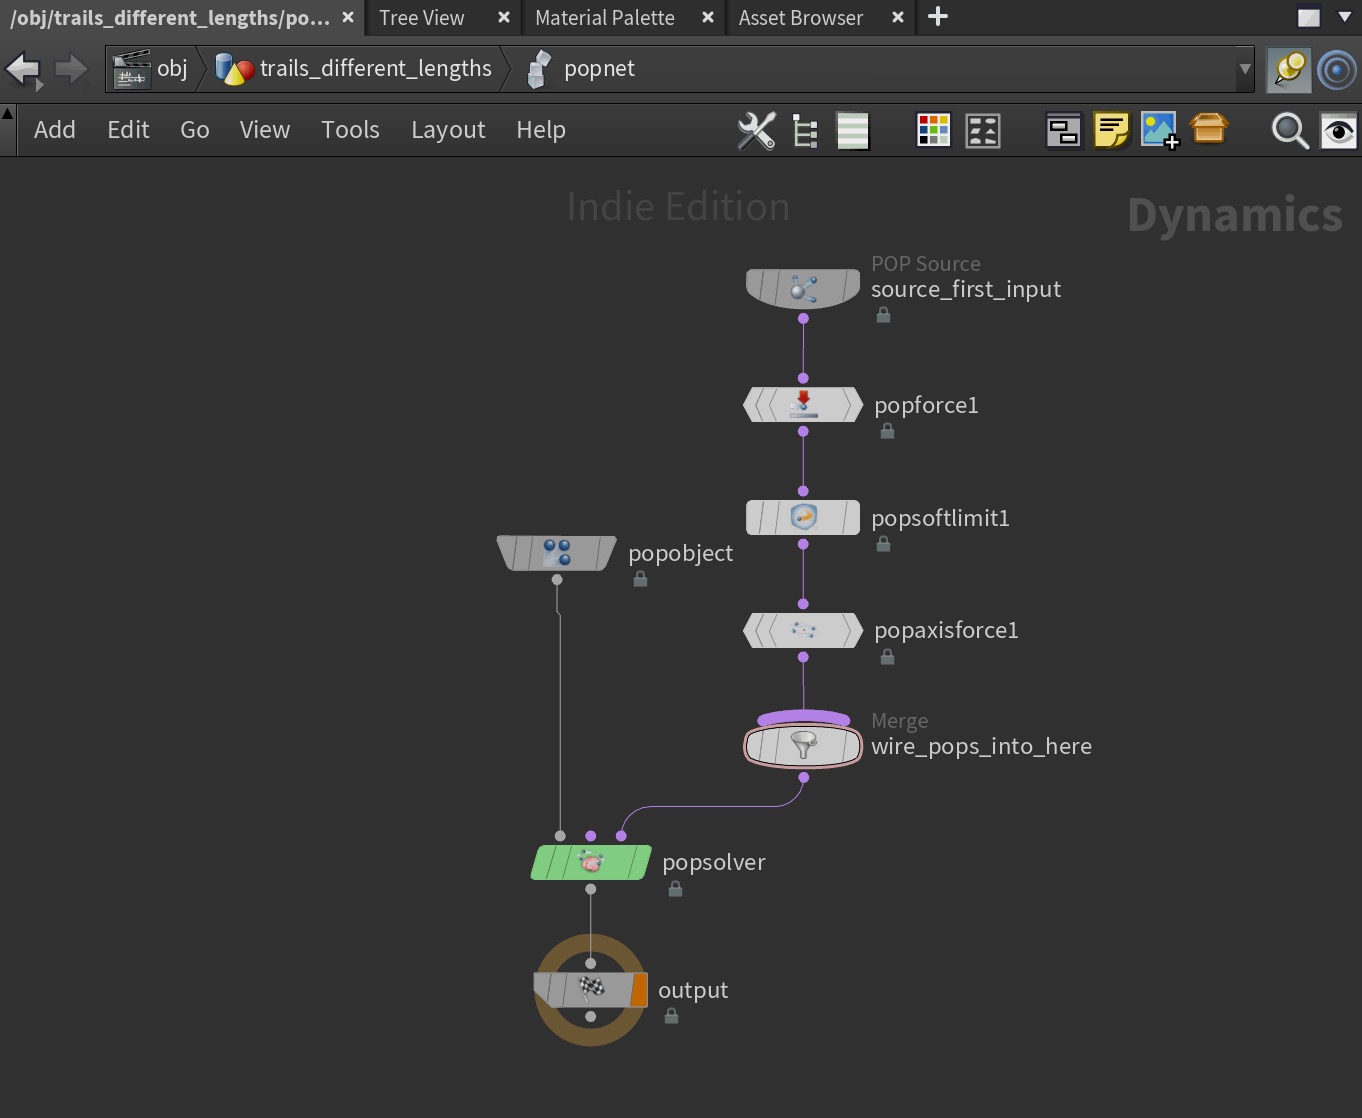
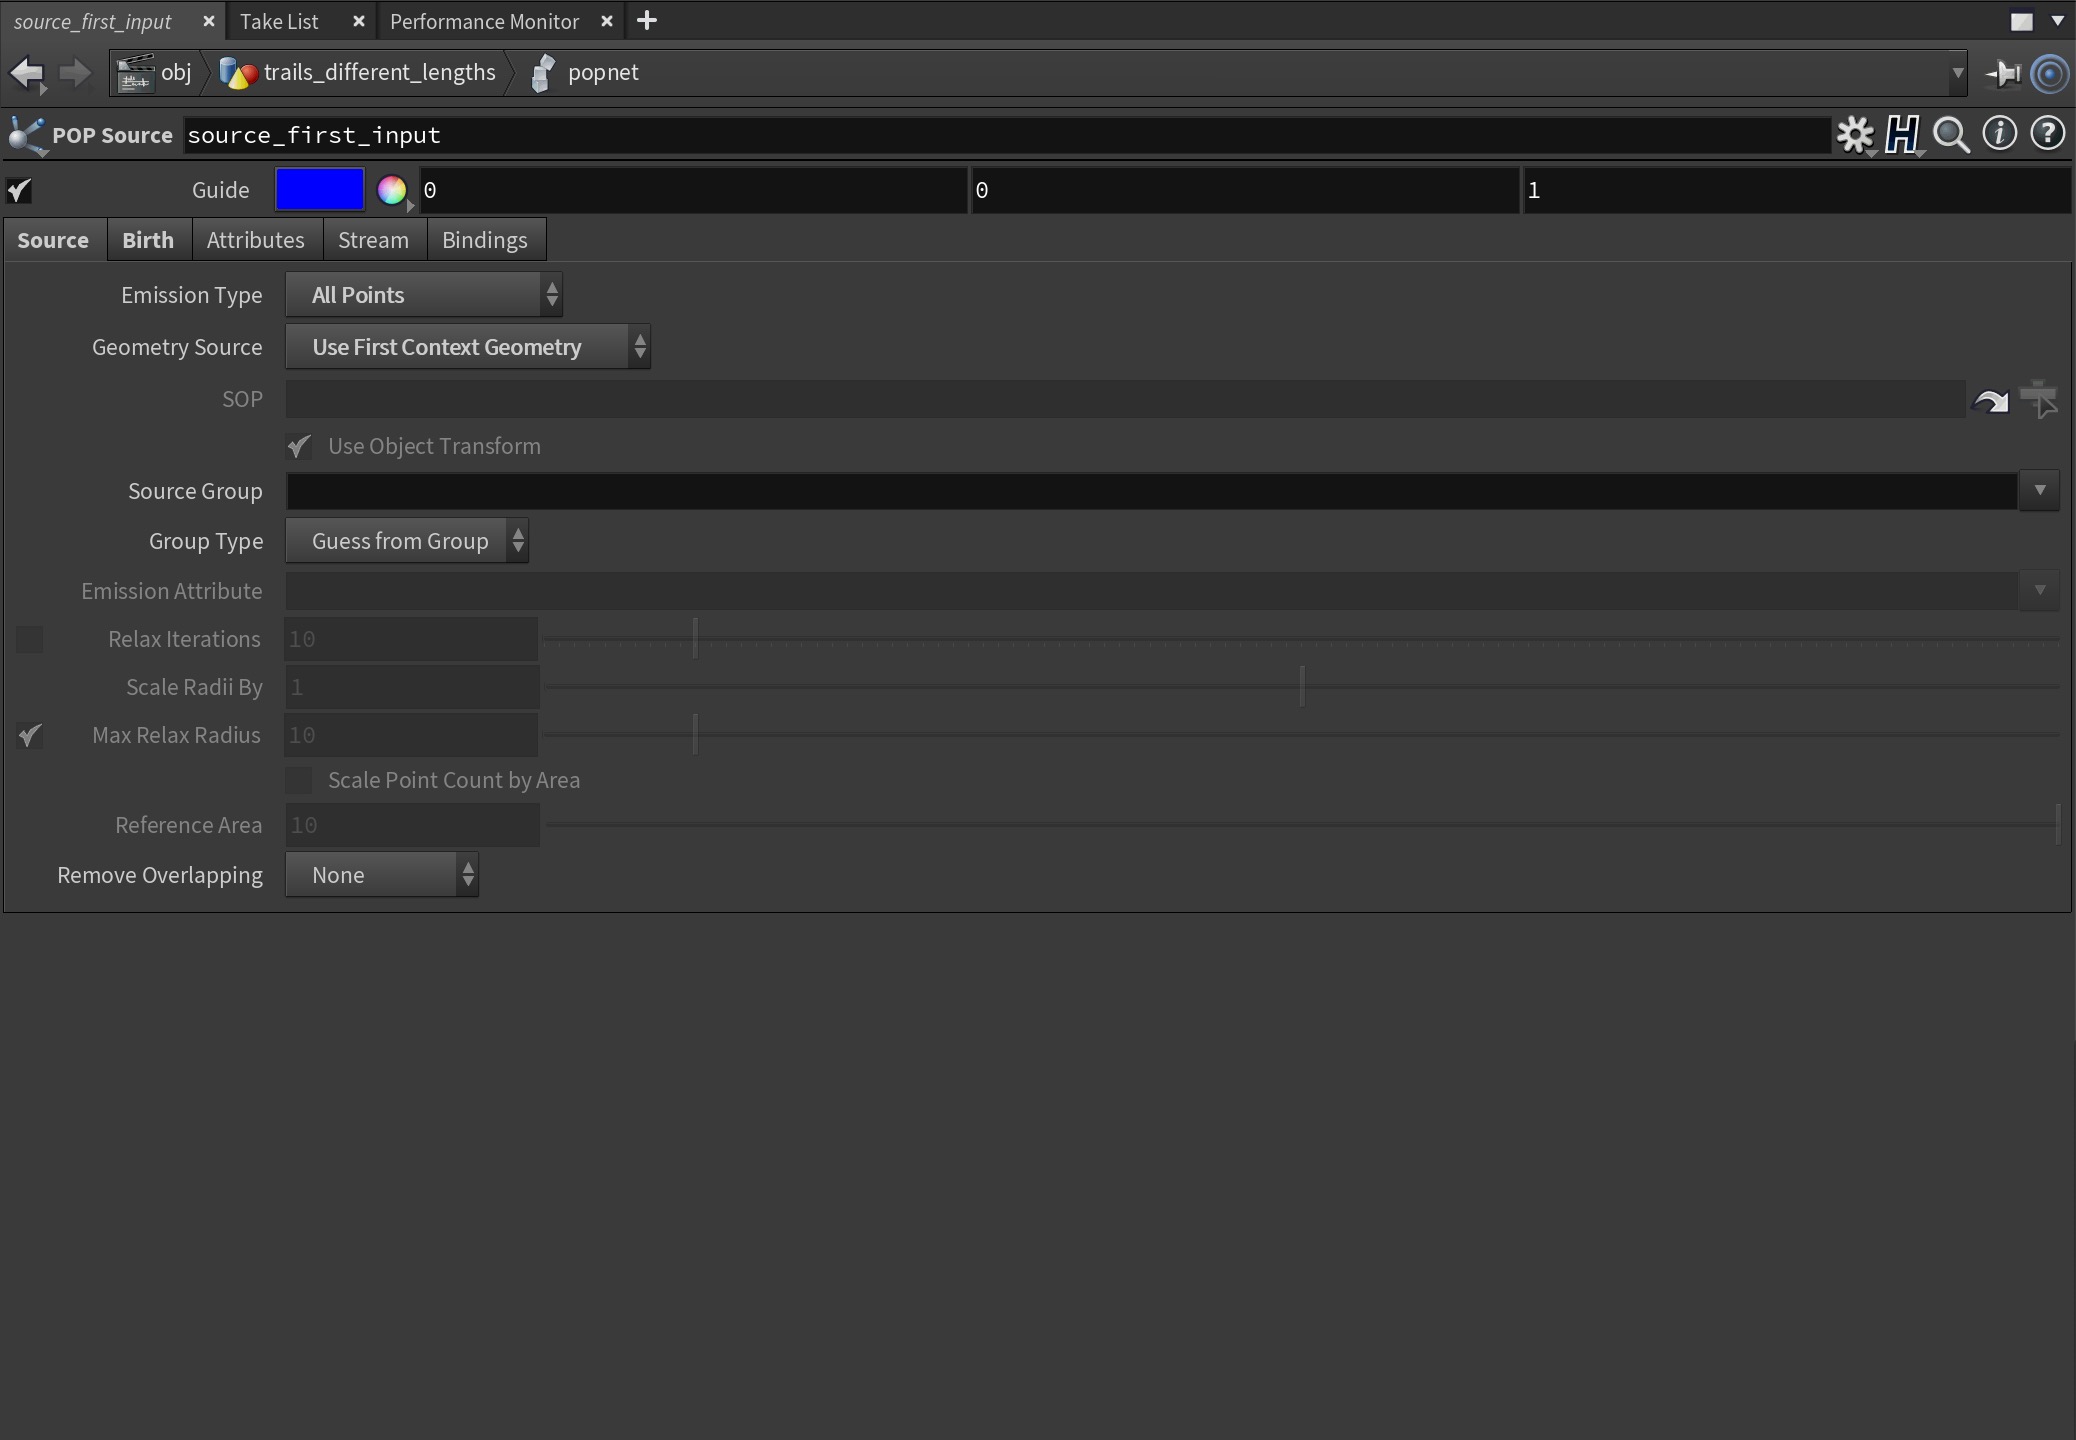
Click on the POP source node and in the Source tab, set the emission type to be All Points. This will use the scattered points as the source particles.
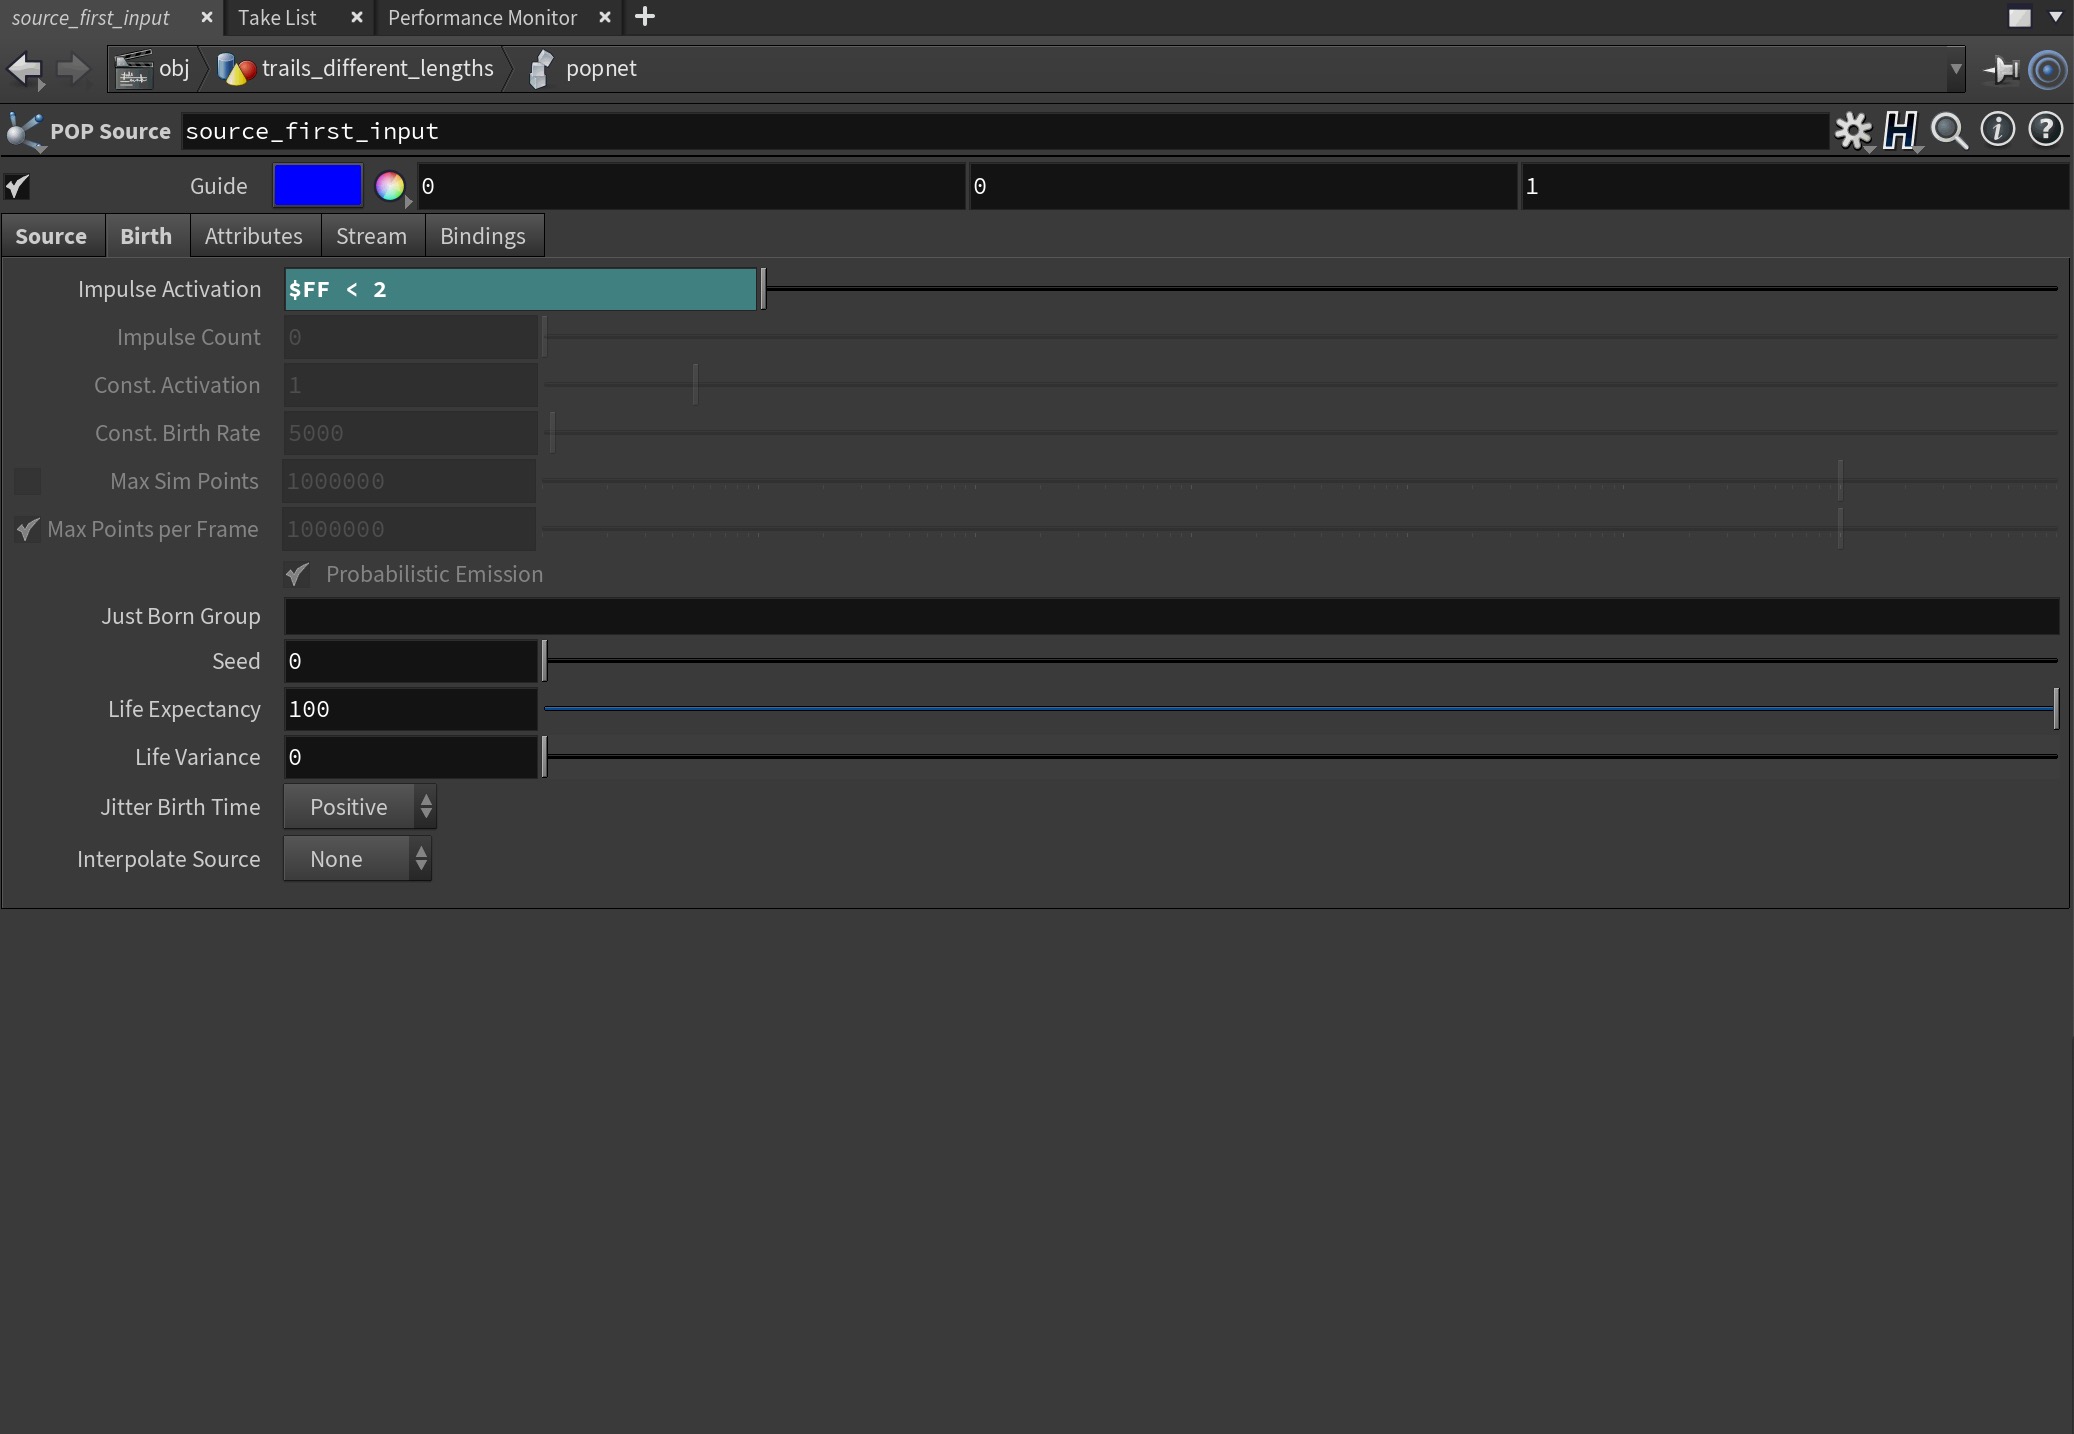
We don't however want it to birth particles on every frame — just the first, so click on the Birth tab and in the Impulse Activation field, change it to read:
$FF < 2This will mean it will only birth particles on the first frame.
Lay down a POP force node and wire it after the POP source node. Change the amplitude to be something other than 0. The rest of the settings can be left as is, or you can play around with them.
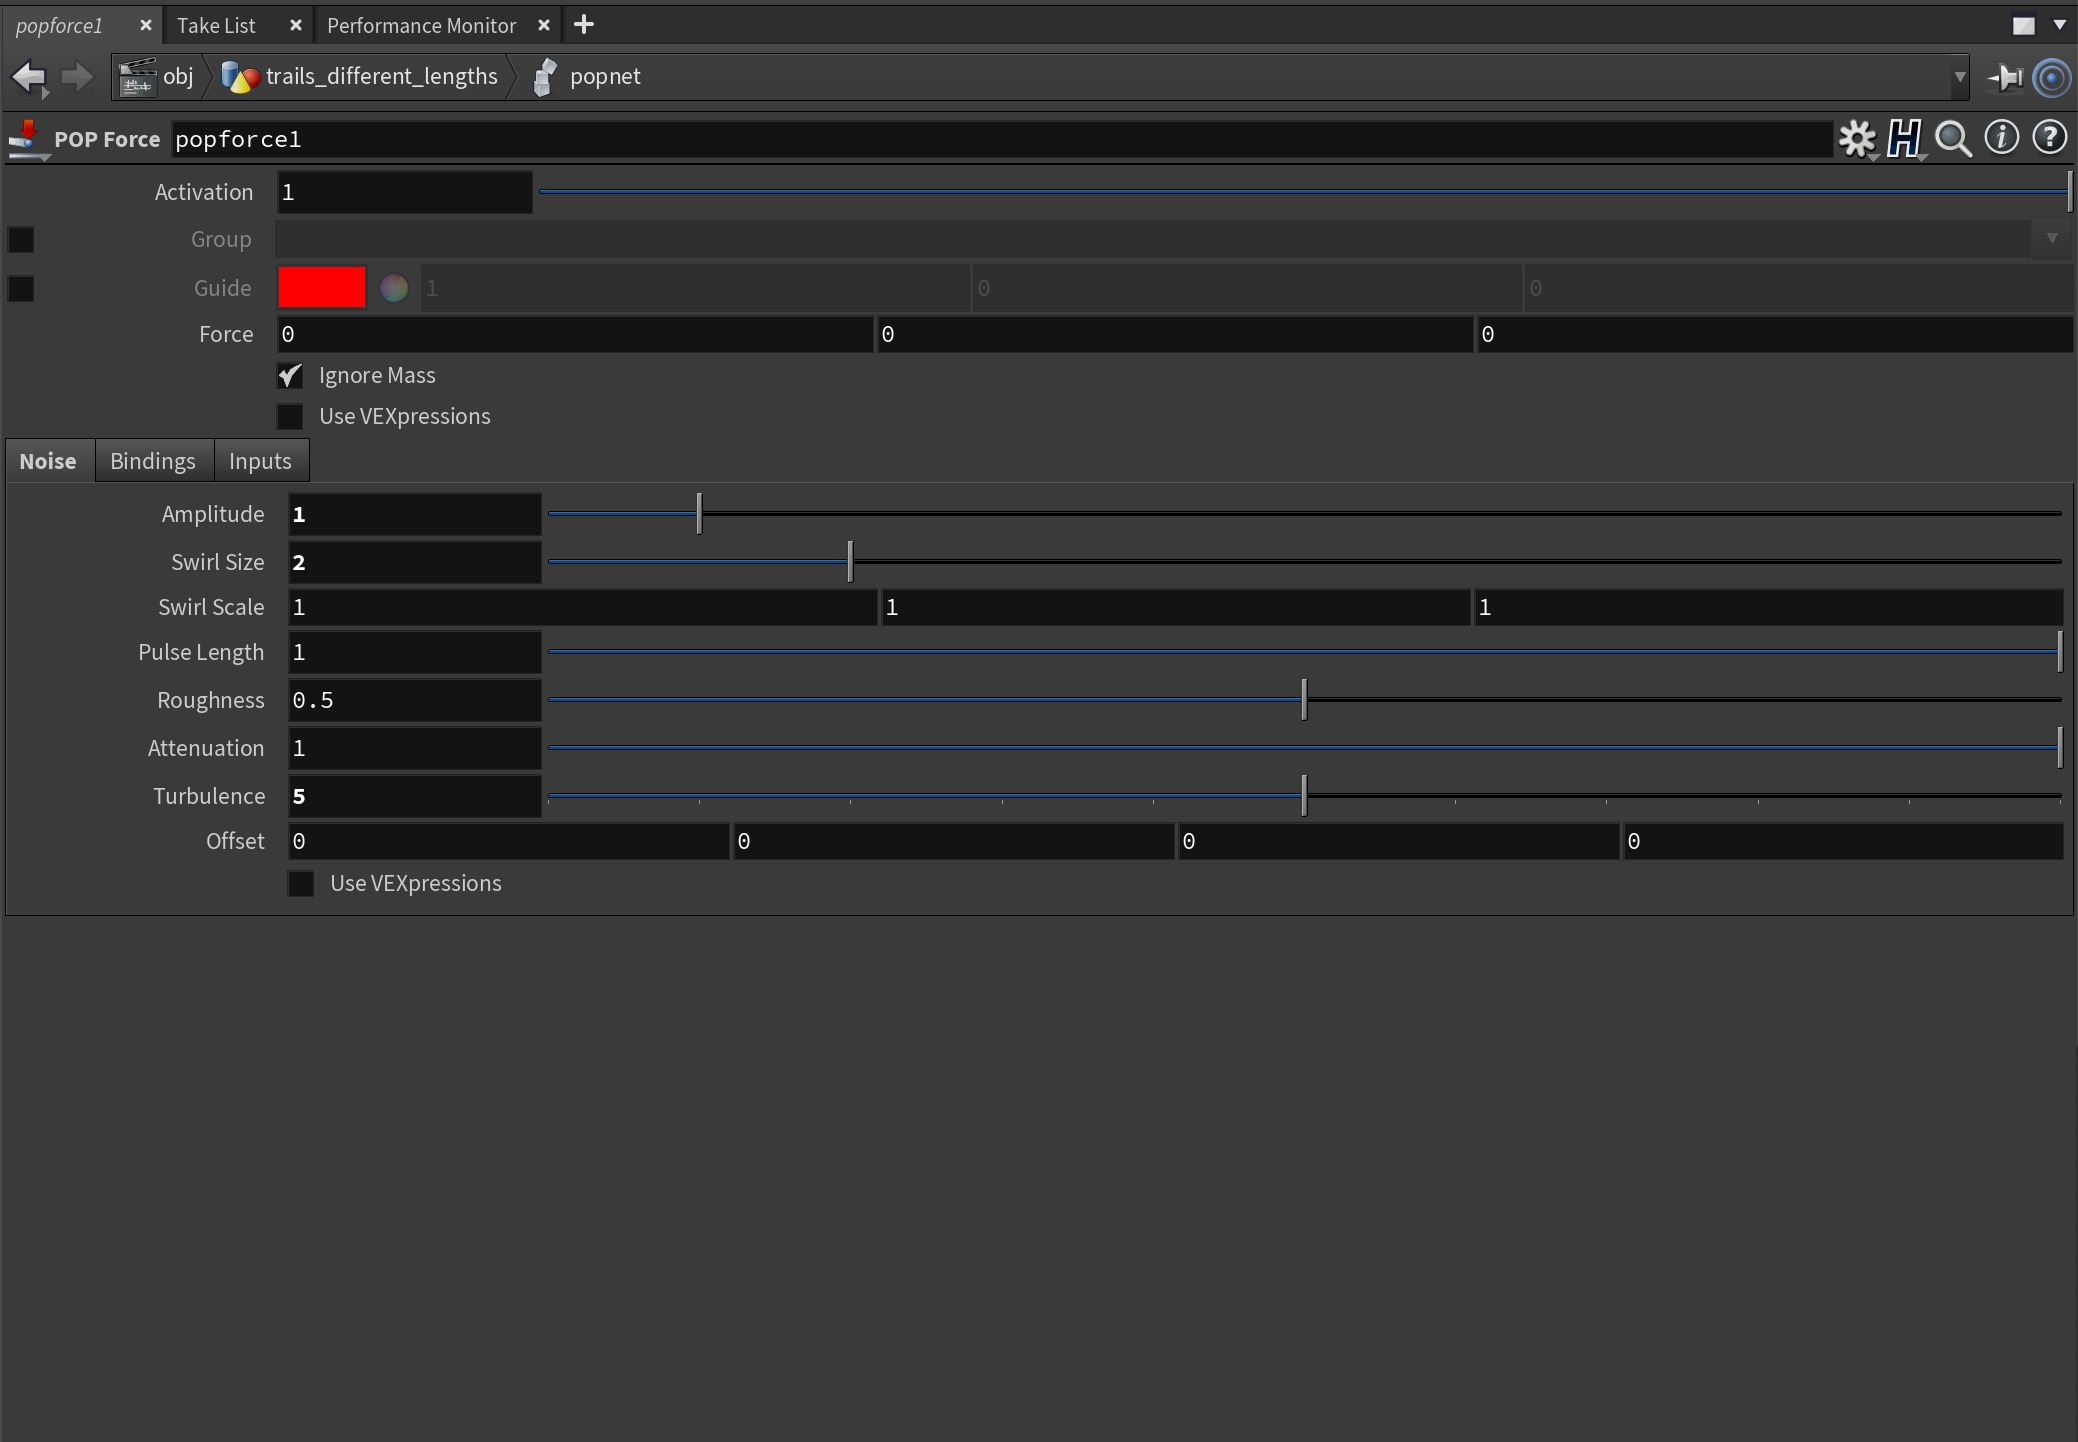
That's pretty much it for the POP node. You can see I added some additional nodes such as a POP Limit to constrain the particles, for this example it's not necessary.
Creating the Trails
Press u to come back up out of the POP network.
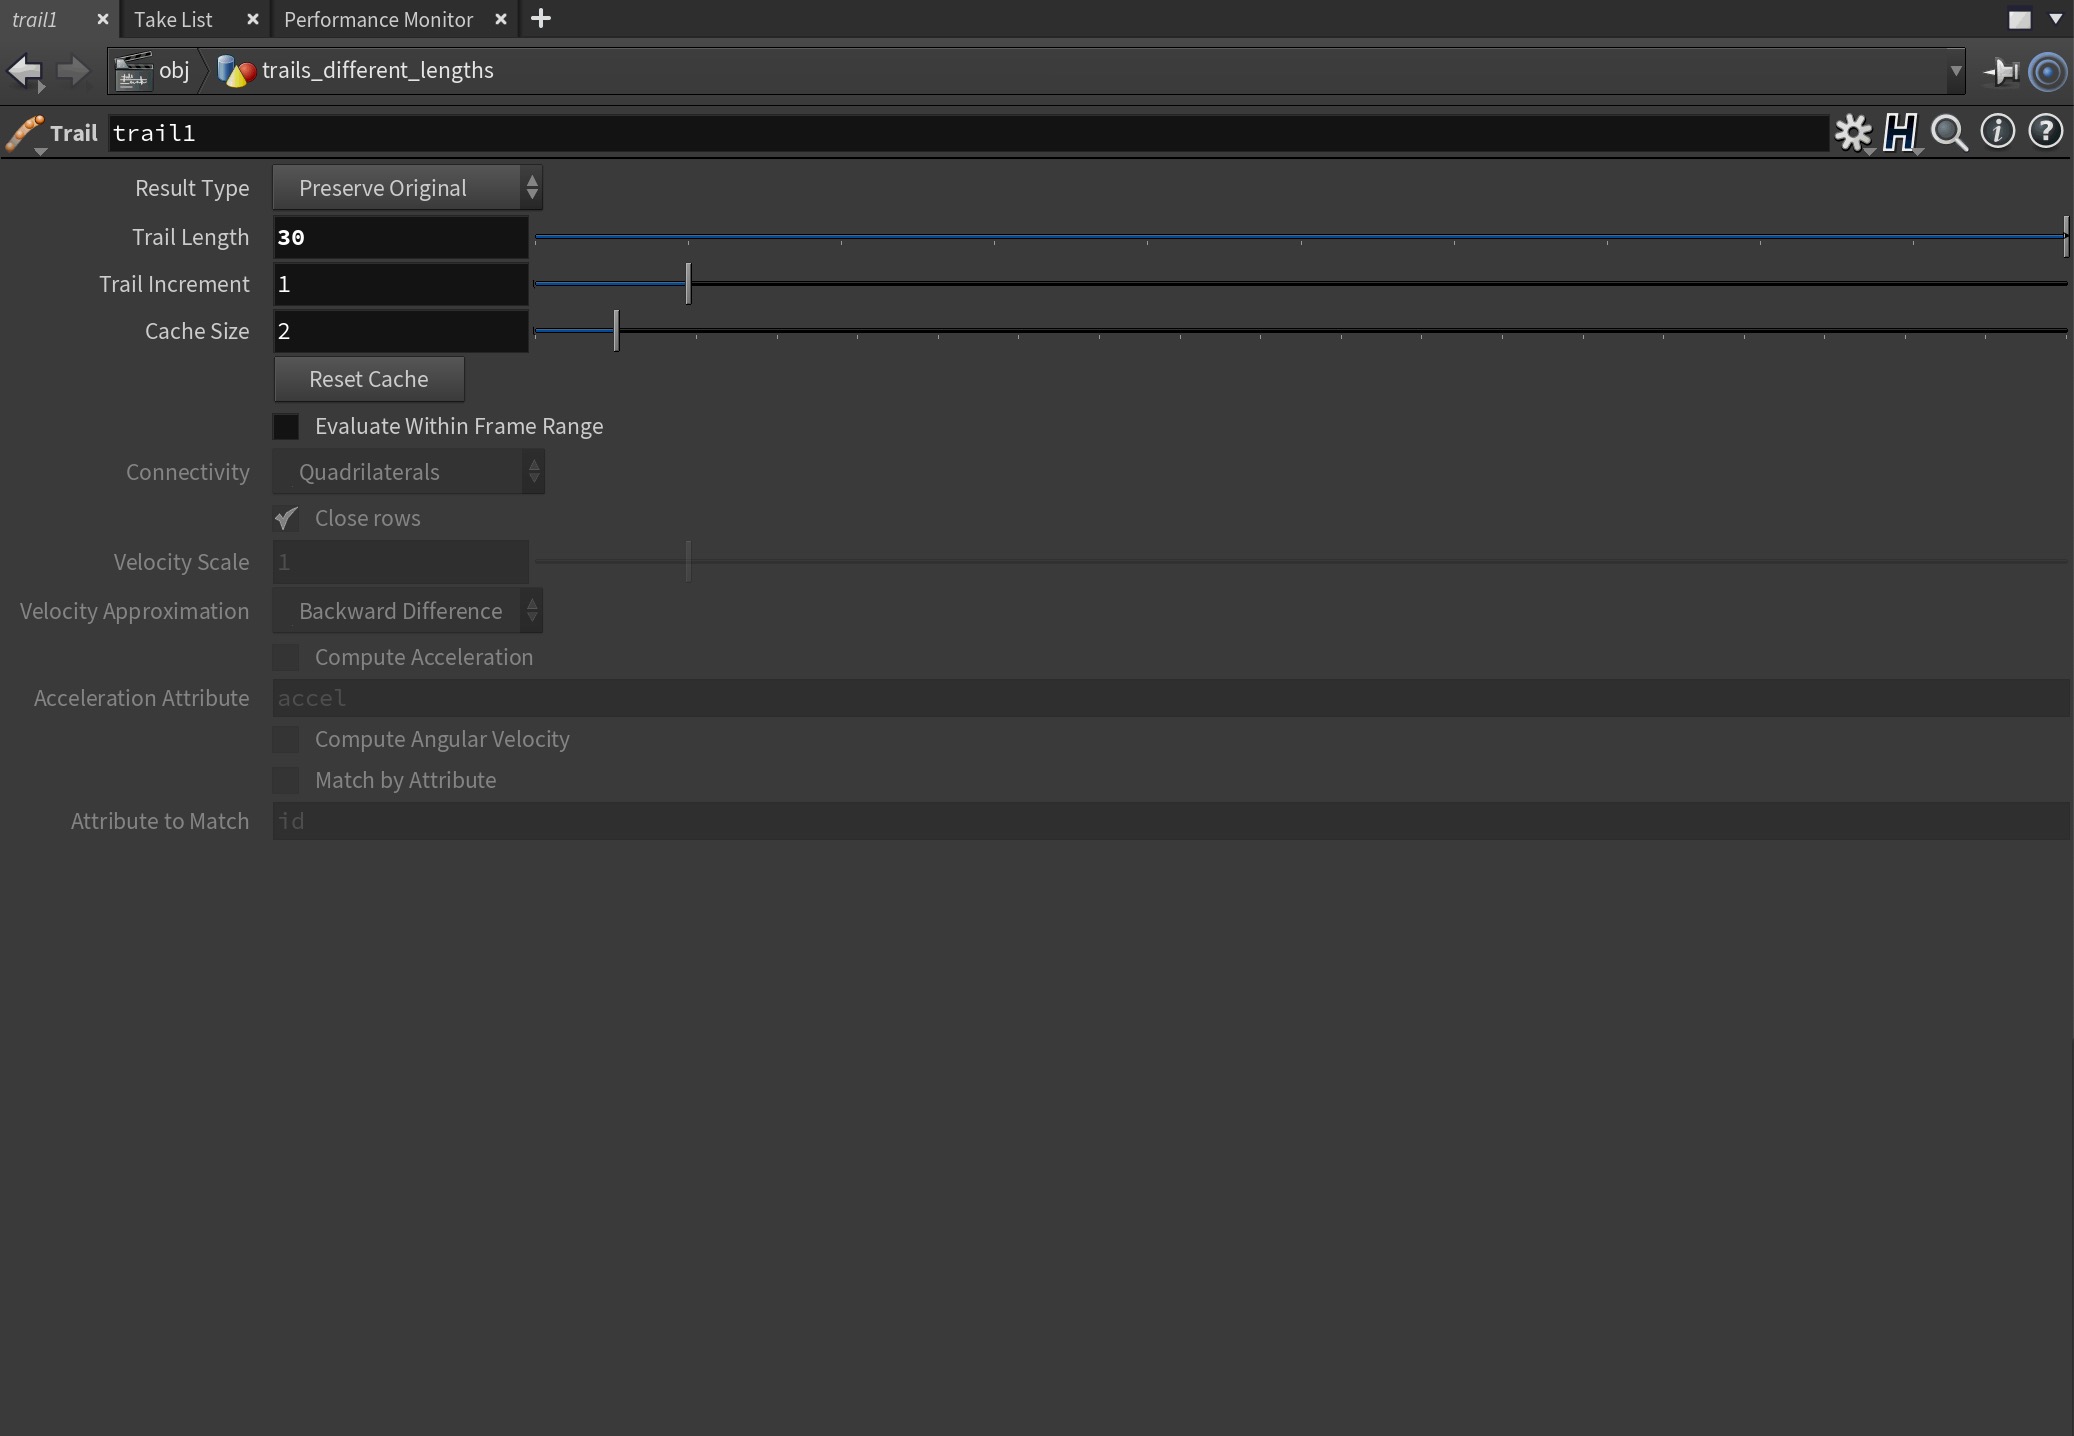
Wire in a Trail SOP after out POP network and set the Result Type to Preserve Original. Also set a base Trail Length. I set mine to 30.
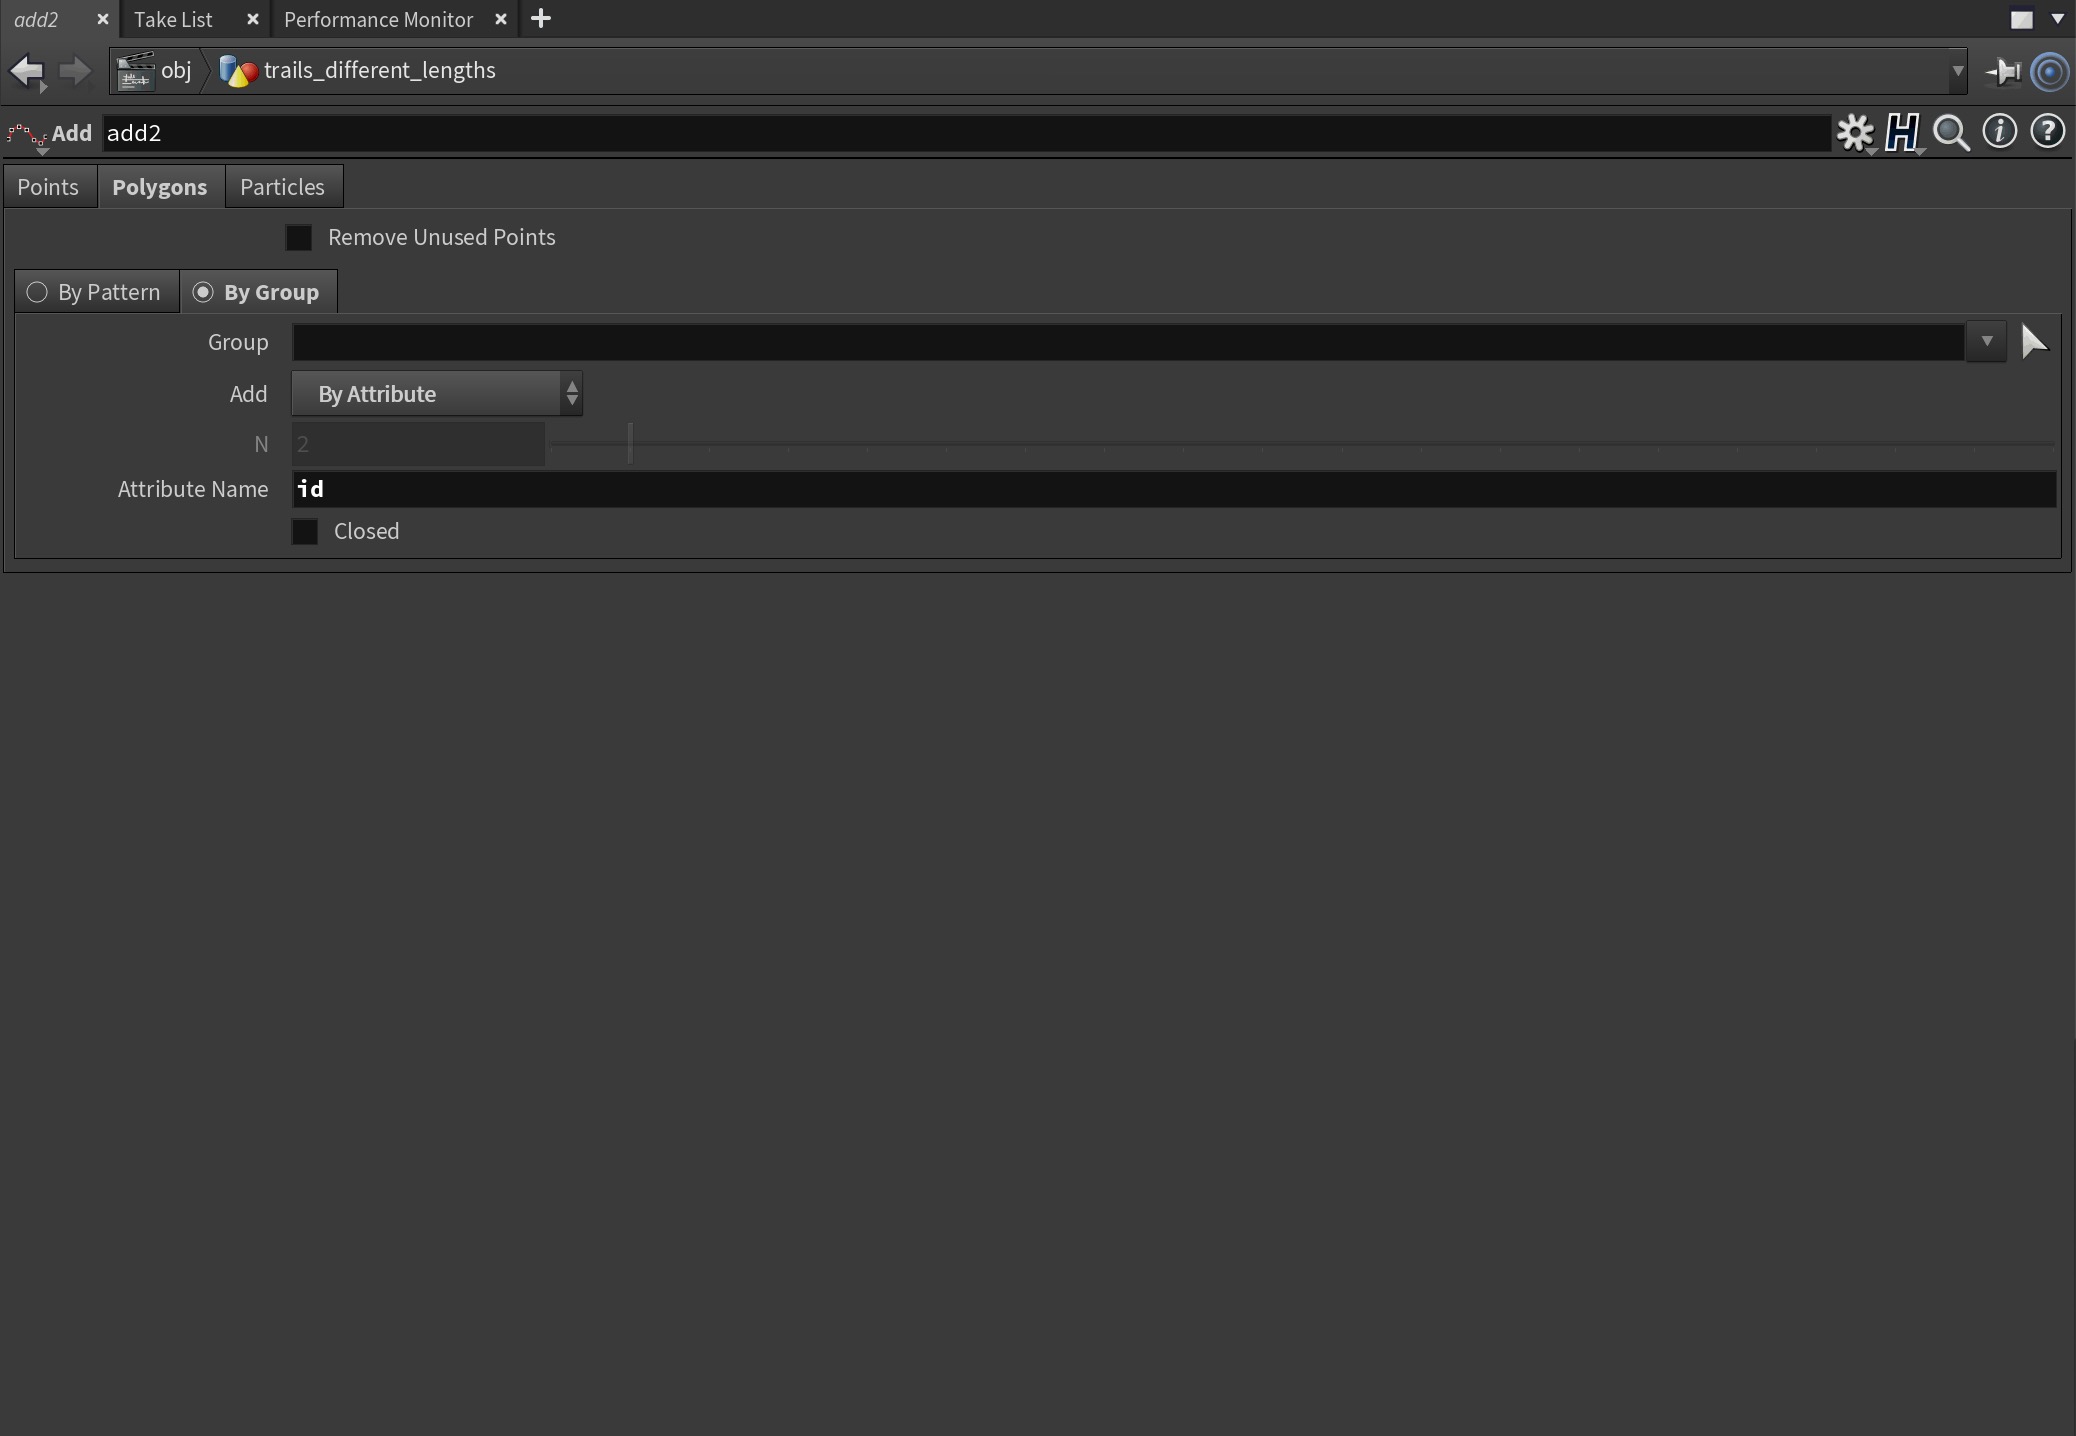
If we ran it now we would see a series of points being trailed from the particles. That's great, but we want those points to be a line. To do that, lay down an Add SOP after the Trail SOP.
Click on the Polygons tab and then choose By Group and change the Add field to be By Attribute. In the Attribute Name field change it to say id. This will now create a Polygon line for each one of the trails.
Varying the Length of the Trails
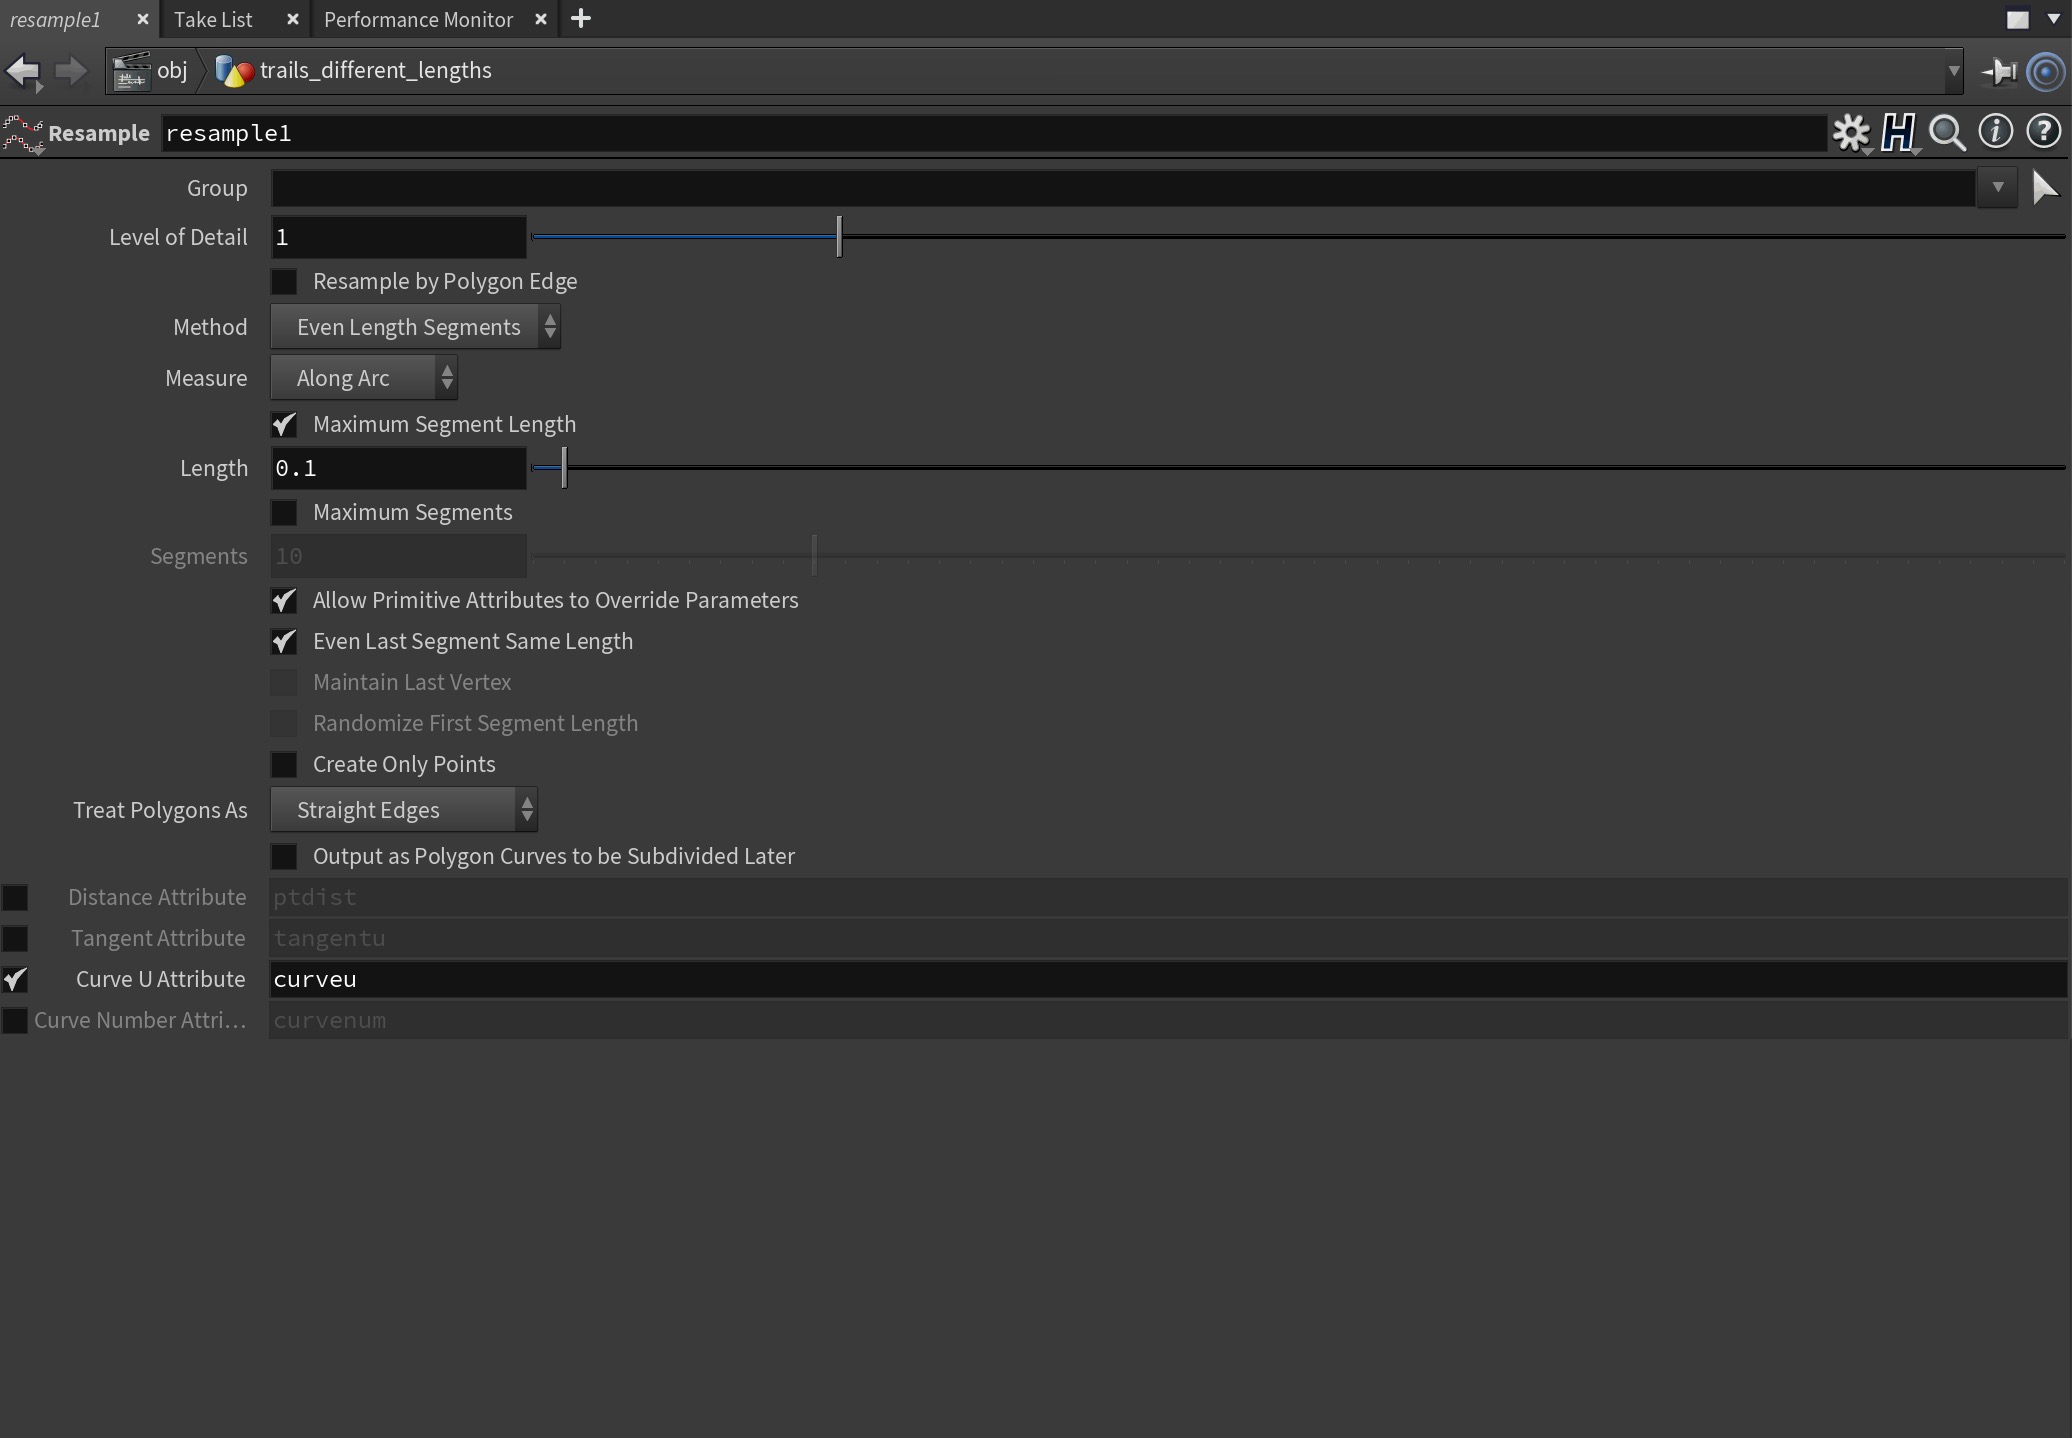
All these trails will have a length of thirty, and we want ours to have random length trails. To do that we'll make use of an attribute called Curve U.
Add a Resample SOP after the Add SOP. The only thing we need to alter in the Resample settings is turning on the Curve U Attribute at the bottom. This will create an attribute called curveu for each point in our Polygon lines, ranging from 0 at the start to 1.0 at the end. It's this attribute we can now use to vary our trail length.
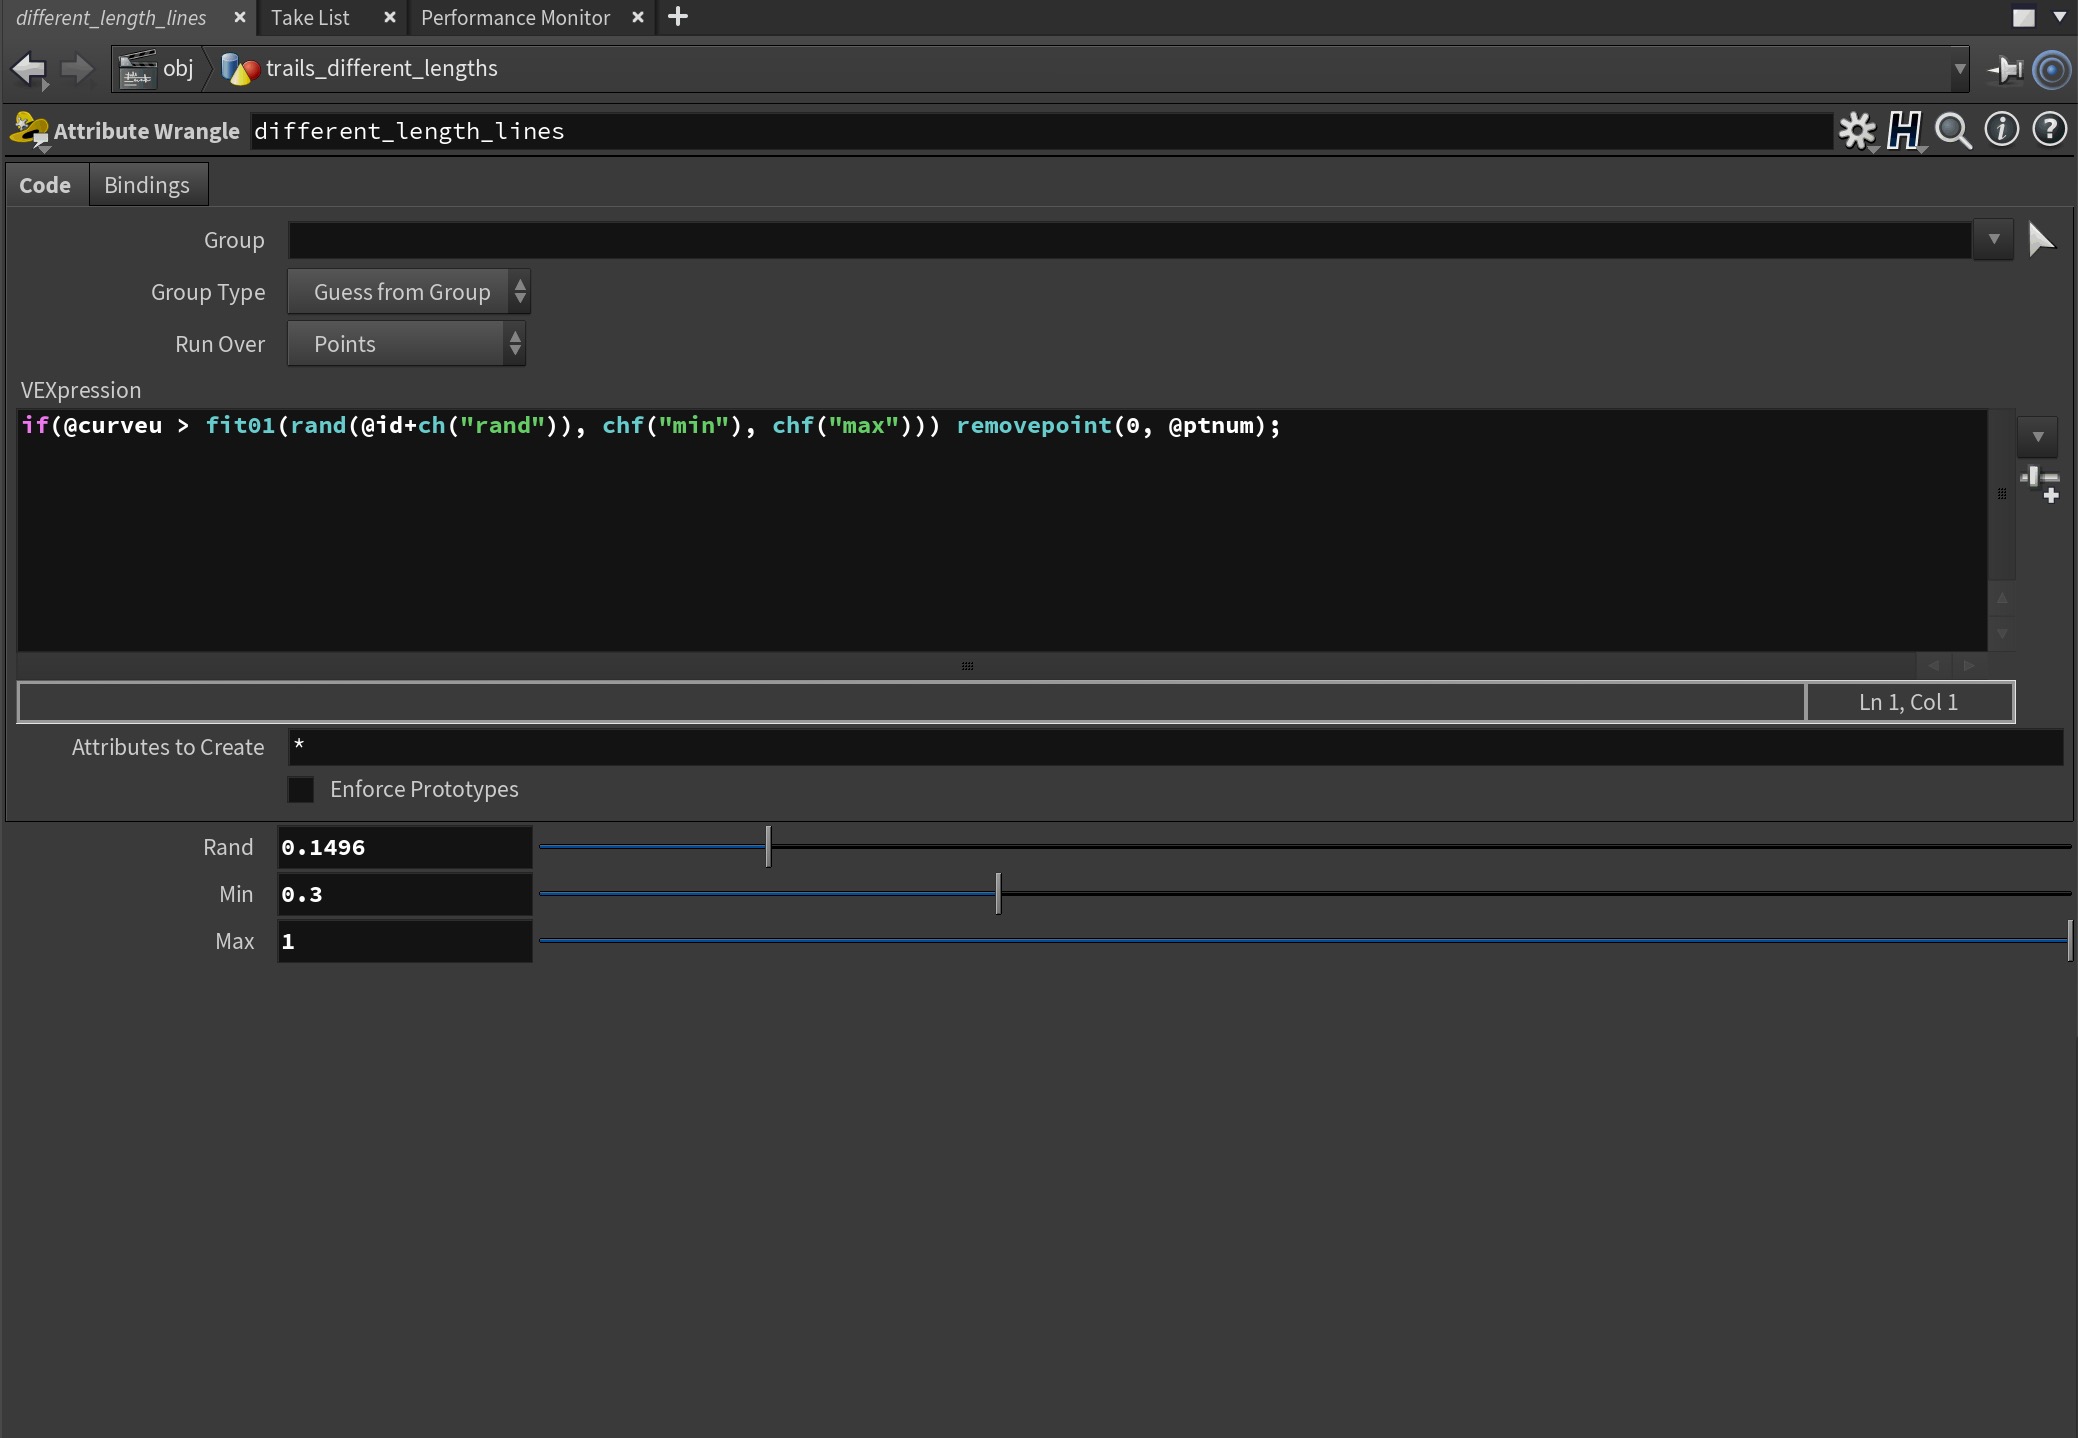
Wire in a Point Wrangle after the Resample SOP and then add this piece of Vex code:
if(@curveu > fit01(rand(@id+ch("rand")), chf("min"), chf("max"))) removepoint(0, @ptnum)Then click on the Create Parameter icon on the right-hand side of the window. You should now see three new fields appear in the Point Wrangle UI. This allows us to control a random seed as well as the Min and Max we want the randomness to use.
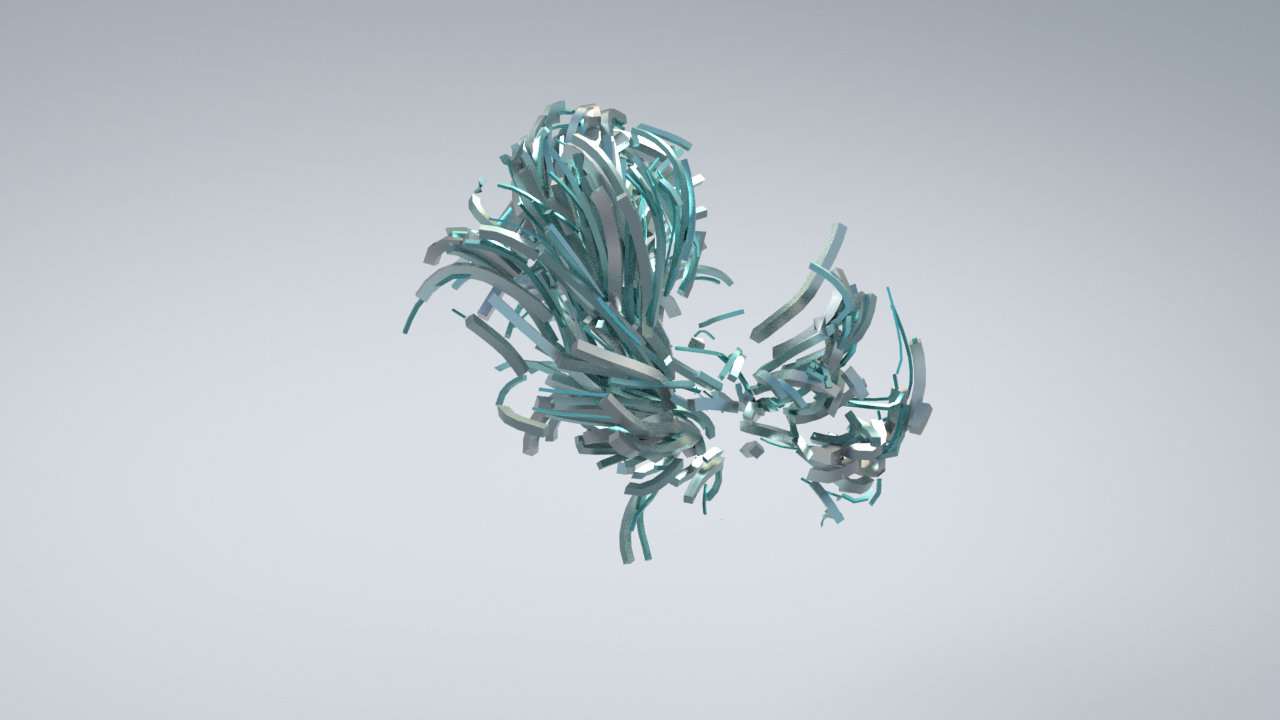
Essentially what our code is doing is looking at the Curve U attribute and then deciding if it needs to remove points based on the random number generated — a number between our Min and Max. This results in lovely trails with varying length.
Finishing Up
This is the basic technique for creating trails with varying length. Following this I used a Sweep SOP to sweep a square tube along the line to give each trail some volume, but that's totally up to you. If you want to have different sized sweeps you can add another Wrangle before the Sweep SOP to randomly set the @pscale value using the @id as a seed.